
After a batch of masala chicken or crispy samosas, the inside of your air fryer is coated in oil splatter, crumbs, and spice residue. Most people know they should clean it. What trips people up is knowing exactly how to do it right, without damaging the basket, the heating element, or the surface coating.
An air fryer has more parts that need attention than a regular pan. The basket, drip tray, interior chamber, fan, and heating coil each need a different approach. Get this wrong, and you end up with scratched coatings, a smoking appliance, and food that tastes like yesterday's cooking.
The type of basket your air fryer has changes how you clean it. PTFE-coated (Teflon) baskets need very careful handling. A scratched PTFE surface can flake off into your food during the next cooking. Using abrasive materials on a non-stick basket is one of the most common causes of premature coating failure. Models with Teflon-free interiors are far more forgiving of regular washing. This guide covers how to clean an air fryer, the tools you need, the mistakes that damage appliances, and how often each cleaning routine should happen.
Why Regular Air Fryer Cleaning Matters
Skipping air fryer cleaning has real consequences for performance, taste, and appliance life.
1. Prevents grease and odour build-up
Old grease on the basket and inside the chamber does not disappear with heat. It sticks to surfaces every time it is cooked and develops a rancid odour when reheated, imparting odours to new food. Regular cleaning will stop this layer from getting to the point where it can't be lifted with a soft sponge, and will prevent it from burning during subsequent use — which would otherwise affect the taste of future meals.[1]
2. Improves air fryer performance
The heating coil and fan work together to push hot air around food. When the fan blades carry grease or the coil has carbonised residue, airflow drops. That grease buildup on the heating element is one of the most common reasons an air fryer starts smoking unexpectedly and cooking unevenly.[2] Clean components cook food faster and more consistently.
3. Helps extend appliance life
Regular cleaning will prevent damage to the heating element and other parts, thus extending the life of the appliance. Over time, grease that gets into the motor or wiring can lead to overheating. This type of damage can be avoided by having a regular cleaning routine.
Things You Need Before You Wash an Air Fryer
Gather these supplies before you start. The right tools protect your air fryer's surfaces and produce better results.
1. Mild dish soap
A standard liquid dish soap handles the basket, tray, and interior walls. Avoid heavy degreasers or anything with strong chemicals, as they can degrade non-stick coatings and leave residue that transfers to food during the next cook.
2. Soft sponge or non-abrasive cloth
This is the most important tool you will use. Any rough scrubbing pad, steel wool, or abrasive surface will scratch your basket. On PTFE-coated models, scratches cause the coating to flake. On glass baskets, heavy abrasion leaves micro-scratches that trap grease. A soft sponge handles most of the cleaning job without any risk.
3. Baking soda paste
If you have baked-on grease, make a paste of baking soda and water and apply it. Apply to the area of the problem, leave for 10–15 minutes, then clean with a soft cloth. For stubborn residue, a ratio of 3:1 (baking soda to water) is recommended.[1]
4. Soft-bristle brush
It is important to use the correct brush (a clean toothbrush is the best type) for the heating coil and fan area. It removes crumbs and grease from hard-to-reach areas without harming the surface or protective layer of the coil.
5. Microfibre cloth
Use a microfibre cloth for the exterior body, control panel, and buttons. A damp microfibre cloth picks up grease and fingerprints without leaving lint or pushing moisture into button gaps.
6. Warm water
Always use warm water to clean. Extremely hot water could stress already-cooled glass parts.
7. Wooden toothpick or skewer
Helps clean small vent holes around the fan housing. Do not poke any metal into vents or openings, as it may scratch the plastic housing or force debris deeper.
Step-by-Step Guide to Clean Your Air Fryer Properly
Step 1: Unplug and let it cool completely
Never clean a hot air fryer. The heating element retains heat for 20 to 30 minutes after the last cook. Cleaning a plugged-in or still-hot appliance poses a real risk of burns and electrical shock. Wait until the unit is fully cool before touching any internal part.
Step 2: Remove and soak the basket and tray
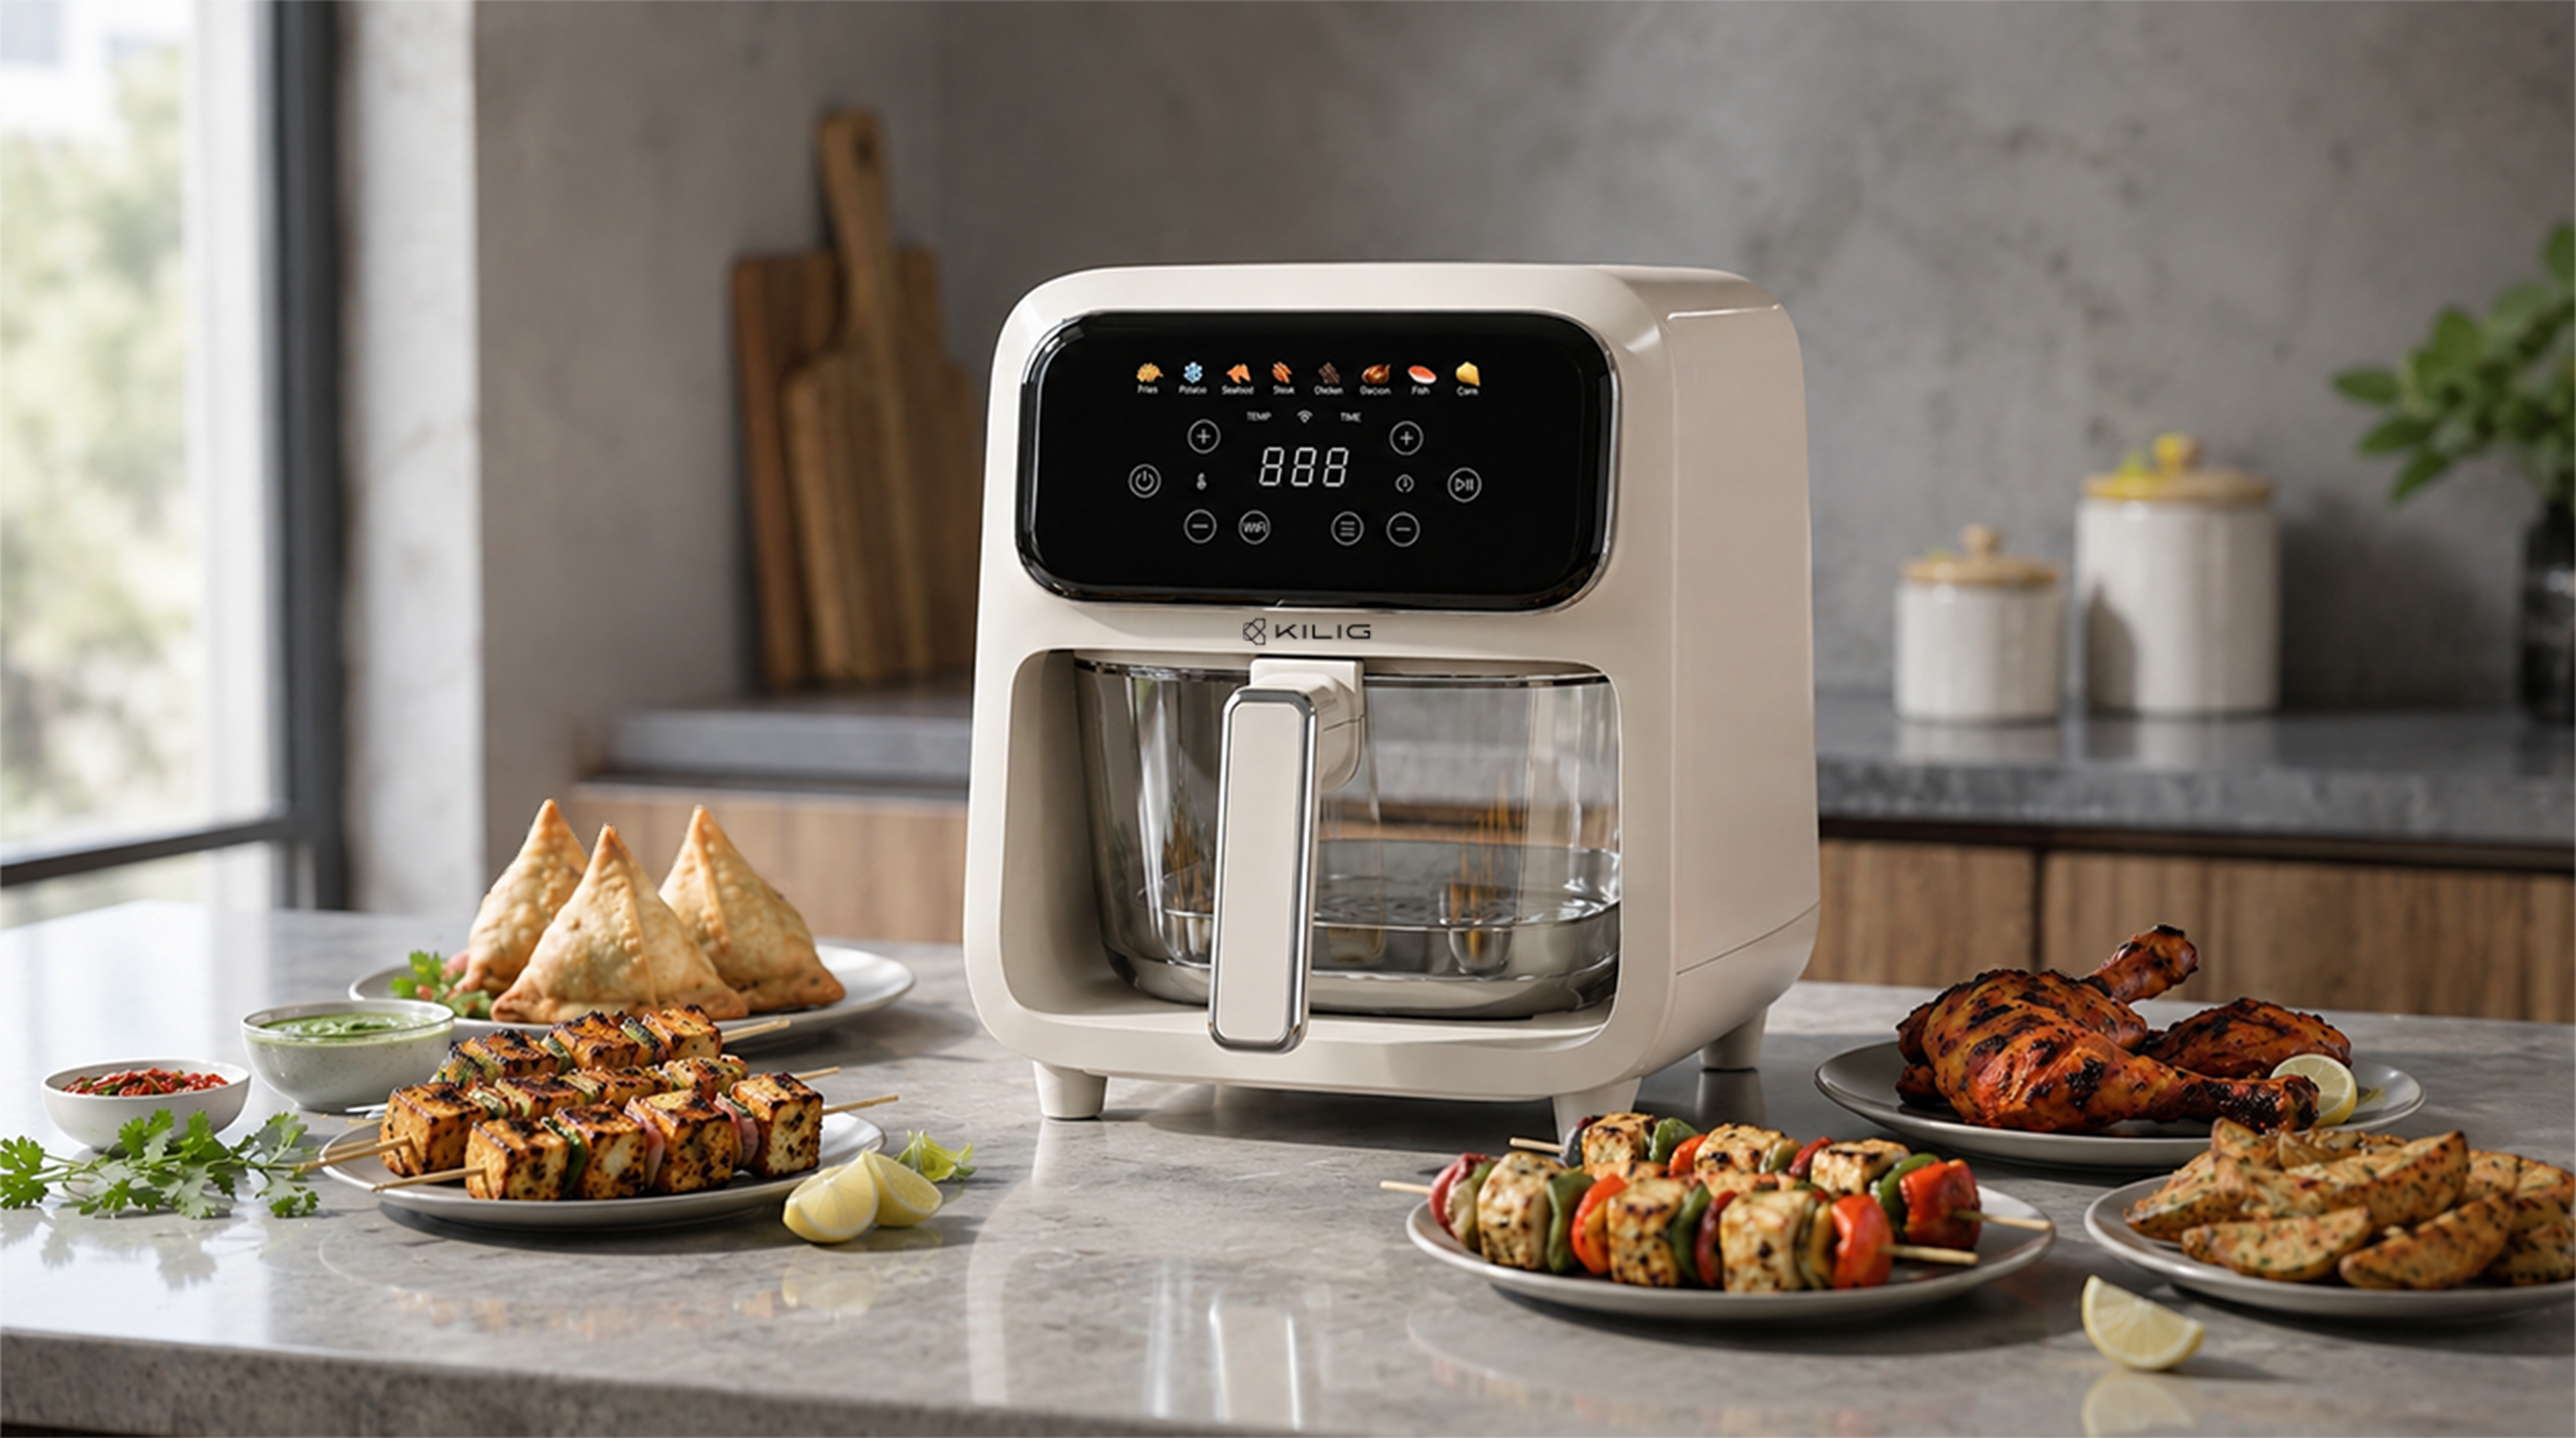
Take out the basket and any removable trays or racks. Fill your sink with warm water and a few drops of dish soap. Let these parts soak for 10 to 15 minutes. Soaking loosens baked-on food and makes scrubbing much easier. For glass baskets like the one on the Kilig Nexa Core 4L, the basket and SUS304 stainless steel tray are completely dishwasher-safe, which makes this step straightforward.
Step 3: Scrub the basket and tray
After soaking, scrub gently with a soft sponge. To clean the air fryer basket, apply baking soda paste and wait 10 minutes before wiping. Rinse thoroughly with clean water. Dry completely before reassembling. Never use metal utensils or abrasive pads on any basket surface, regardless of the material.
Step 4: Wipe down the interior chamber
Use a damp soft cloth with a small amount of dish soap to clean the inside walls. Pay attention to the corners and the bottom, where oil drips settle. Do not pour water directly into the chamber. A damp cloth controls exactly how much moisture enters the appliance.
Step 5: Clean the heating coil and element
Next comes how to clean an air fryer coil. The heating coil in most basket-style air fryers sits at the top of the chamber. Turn the air fryer upside down for better access. Use a soft-bristle brush to gently dislodge crumbs and grease from the coil. Do not use water directly on the element. Use a barely-damp cloth for light wiping of the element, then leave it fully dry for at least 30 to 60 minutes before plugging back in.[3]
Step 6: Clean the fan and wipe down the exterior
Use your soft-bristle brush to clean around and between the fan blades. Then wipe the outer body, control panel, and buttons with a damp microfibre cloth. Make sure no moisture gets into the vents or button gaps. Let everything dry fully before plugging the air fryer back in.
Common Mistakes to Avoid While Cleaning an Air Fryer
1. Using abrasive scrubbers
Steel wool, rough sponge pads, and metal scrubbers are the most common cause of basket coating damage. On PTFE-coated models, scratches allow the coating to degrade and flake into food during cooking. A compromised Teflon surface begins releasing compounds at high temperatures, which is a direct food safety concern.[4]
2. Washing electrical components under running water
The basket and removable trays can be washed in a sink. The main body, heating coil, and fan unit must not be washed. Water reaching the motor or wiring causes electrical shorts and permanent damage. Use only a damp cloth on any non-removable internal part.
3. Cleaning before the appliance cools down
The interior of an air fryer stays very hot after cooking. Working on a warm surface causes cleaning agents to dry out before they can lift the grease properly.
4. Ignoring regular maintenance
A quick wipe after every use takes less than two minutes and prevents significant grease accumulation. Skipping cleaning for weeks means the grease carbonises onto surfaces and becomes very difficult to remove without products that are too harsh for the basket material.
How Often Should You Wash Your Air Fryer?
Daily cleaning
Remove the basket and tray after use and wash with warm soapy water. Use a dry cloth or lightly dampened cloth to clean the inside chamber. This will save you from grease baking onto surfaces and takes only about 2 minutes. Clean the air fryer after every use.
Weekly deep clean
Do a deep clean every week, covering the outside, the fan area, and the heating coil. Soak for 10–15 minutes, gently scrub with a soft sponge, and dry thoroughly before reassembling.
Note: If you see smoke coming from the appliance mid-cook, smell burning that isn't from the food, or notice visible grease buildup on the heating coil, clean the unit before using it again.
Why Choose Kilig Air Fryers for Easy Cleaning and Smart Cooking
Most air fryers require careful cleaning. Their non-stick coatings are fragile — one wrong sponge and the basket starts flaking. Kilig air fryers are designed with this problem in mind.
The Kilig Nexa Core 4L uses a borosilicate glass basket with zero PTFE, PFAS, or PFOA coatings. Glass does not flake, is not damaged by soft sponges, and does not degrade with regular washing. The basket and the SUS304 stainless steel tray are both fully dishwasher-safe, making daily cleanup straightforward after every meal.
The Kilig Nexa Edge 12L has a galvanised steel inner chamber with no coating of any kind. There is no surface to scratch, flake, or degrade over time. The rotisserie basket and accessories are removable and dishwasher-safe.
The Kilig Nexa SteamX 10.5L includes a self-clean steam function that uses steam to loosen residue from the chamber walls, cutting down on manual scrubbing after heavy cooking sessions.
For compact everyday use, the Kilig Iris Plus is simple to disassemble and clean, with a small footprint that fits easily under a tap.
All models come with a 2-year warranty and are available in our air fryers collection.
Frequently Asked Questions
Can I clean my air fryer immediately after cooking?
No. Wait at least 20 to 30 minutes for the appliance to cool completely before touching any part. The heating element and interior walls hold temperature long after the machine is switched off. Cleaning too soon risks burns and prevents cleaning agents from working properly on the surface.
Can I use metal scrubbers inside an air fryer?
No. Metal scrubbers, steel wool, and rough abrasive pads scratch basket surfaces. On PTFE-coated baskets, scratches allow the coating to degrade and flake into your food during the next cook. On glass or stainless steel surfaces, metal scrubbers leave marks that trap grease over time. Use a soft sponge or a non-abrasive cloth for all interior surfaces.
How do I keep my air fryer grease-free for longer?
Line the basket with parchment paper or an air fryer liner before cooking oily or marinated foods. This catches most of the dripping oil before it reaches the basket or tray. Rinse the basket after every use, even after a short cook. Do not let grease sit overnight. These two habits reduce the amount of deep cleaning needed by a large margin.
Do all air fryer parts need to be cleaned after every use?
Not all of them. The basket and drip tray need cleaning after every use. The interior chamber walls need a quick wipe-down after every use if you notice oil splatter. The heating coil, fan, and exterior need attention once a week, or whenever you notice visible grease or reduced cooking performance. Checking the coil weekly catches buildup early before it becomes difficult to remove.
Can improper cleaning damage the air fryer coating?
Yes. This is a real concern with PTFE-coated basket models. Abrasive scrubbers, metal tools, and harsh chemical cleaners all degrade non-stick coatings faster than normal wear. The safest way to avoid this entirely is to choose a model with a glass or uncoated stainless steel cooking surface, such as the Kilig Nexa Core or the Nexa Edge.

Share:
How to Cook French Fries in an Air Fryer?
How Does an Air Fryer Work? The Science Behind Healthy, Oil-Free Cooking